The Giving Has Begun

My 40th Birthday is Thursday!  I'm not one to really celebrate birthdays too much, especially these big ones.  But I've decided to embrace it instead of getting all sour about it.


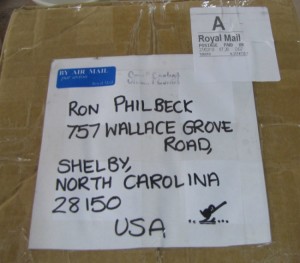
Just now a package arrived. Here is the label.  The Little Birdie and Royal Mail label was a dead giveaway.


It was from my pal Hannah!


Inside was....


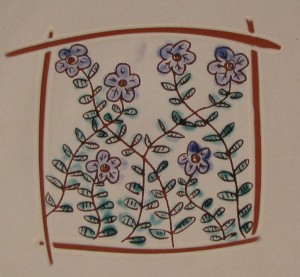
a great little mug and a card with a print  from an etching that  Hannah recently made.  I'm so excited!!  Thank you Hannah!!!  Love them both!!

So if anyone wants to send anything else this way, feel free.  I'm open for pottery, candy, concert tickets, Warren Makenzie pots, tee shirts, socks, gift certificates to Amazon.com, cash, TastyKakes, beach house rentals paid in full, whatever. Ha! I'm just kidding of course, we'll save all that up for 50!!

Okay I'm off to make some tea in my fine new mug!!

Monday. A Few Quick Thoughts

Below are a few pots made by this year's presenters.  Soda fired porcelain by Lorna Meaden. Reduction fired porcelain by Sarah Jaeger.  And stoneware by Bruce Cochrane.  Click for larger image.

[gallery link="file" order="DESC" orderby="title"]

I always come away from the Conference with lots of questions and ideas about my work and how I'm working.  These presenters all worked in different ways than I do and made pots that were quite different than my own.  I enjoyed hearing about their creative processes and also learning that we as potters share many similarities even though the objects we make are visually different.

I was so impressed with Bruce Cochrane's precision and well thought out making methods.  It was nice that his precise ways did not kill his pots.  His work really shows off his attention to details and remains warm and approachable.

I'm still a salt/soda potter at heart so of course I loved Lorna's pots.  If I go back to vapor glazing it will be with porcelain.  The wet look of the fired pot is so appealing to me.  I did resist licking any pots this year.

Sara Jaeger is very dedicated to function and she makes around 2000 pots a year. (give or take a hundred or so).  I have seen her work in books and magazines over the years so it was nice to get to see her make pots.  I got the feeling her life is completely dedicated to work and it shows in the finished pots.  I have no doubt that her pots function very well in the home and kitchen.

I didn't take as many pics as I would have liked, but to be honest it was nice to sit and be present as folks worked and talked.  I'll try to write a little more later today and also let you know what's coming up for me in the very near future.

PS If you are a new visitor here and met me at the Conference then please bookmark this site and come back often. You can also sign up for my email list over on the right.  Thanks!!

Home from the Conference

[gallery link="file" order="DESC" orderby="title"]

The NC Potter's Conference was once again a great event.  This years presenters were Lorna Meaden, Bruce Cochrane, and Sara Jaeger.  They each brought their unique talents and knowledge to the Conference.

I had fun hanging out with all my blogger pals and pottery friends.  I'll do some posts this week and get a few pics up.  I'm pretty wiped out right now and just ready to sit back and put my feet up.

Check back soon.

Ready for Spring Flowers


It's a beautiful morning here!  The sun is shining bright and I'm getting ready for a long weekend away at the NC Potter's Conference.

I have boards of bowls and platters to foot today though, so there's work to be done.

I want to mention two events that are fast approaching.  The first is my Spring Pottery Sale.  I will be having a guest this year, my very good friend Jennifer Mecca. Many of you read her blog and know her lovely pots.  I'm excited to host her here at my Spring Sale.  I hope you'll mark your calendars now for Saturday, March 20th from 10 am till 4pm.  We will both have some really great pots!

I will be having Show of New Work in April at the NC Crafts Gallery in Carrboro, NC.  The show opens on April 9th.  There will be a reception that evening from 6pm till 9pm and I will be present.  For more information you can visit the gallery's website HERE.

To receive information on these events and more you can sign up to be on my email list. Just use the form on the right side of this page.  It's quick and easy and I do not share this information.

Thanks for checking in.  I'll be posting over the next few days from the Conference.  I'll be rooming with Mr. Michael Kline of Sawdust and Dirt.  I am sure we will find some good material to share via our blogs!!!

March!!


I love when March arrives!  It means spring for me, although we can still have some cool weather and even snow, it's a turning point for me.  It's my birthday month too.  I'm going to be 40 this year!! Wow, that seems like such a huge deal.

Don't forget, I'll be listing pots on my Etsy Shop today at 1 pm EST.

Here's the LINK to the shop. And it should show up in the sidebar to the right here  at that time.

Quick Pics

Just unloaded the kiln.  Here's a first glace at the pots. I'm pleased overall.  I'll get to spend some time looking at them later today, but now I'm off to my acupuncture appointment in the city.

Click for larger, more complete image.

[gallery link="file" order="DESC" columns="2" orderby="title"]

I'll be posting pots for sale on my Etsy site Monday!

Part 2.

So like I said before, I have all these bits and pieces of ideas in my journal and in my head.  Then I come out to the studio and I'm faced with a 3-d object ready to be decorated.  It's very difficult to marry the deco to the pot in a successful manner. It is for me anyhow.

I do a little pencil sketch on the dry slip to get going, lay everything out, get the eyes right, or the socks in the right place.  Then I sit down and dig in.  I try to work fairly quickly with the tool to scratch into the slip.  If I make a mistake I improvise and turn that into part of the drawing (this is where working in pen and ink has helped me).  This sharp tool that I'm using with the angled point really cuts the slip away, I let the tool move and see what happens.  I pull or push the tool, and this gives different results.  I can lighten up on the pressure or bear down to get a mark.  The pencil outline guides me but it's just a guide, the final drawing comes from working quickly with the steel tool.

I think working quickly with the final drawing is best.  I pay attention to what the marks look like and I don't hesitate when my hand automatically decides to do something.  I just go and hope it's good.  When I'm finished I don't mess with it much.  No use in killing it by over thinking it.

As far as composition goes I try to work that out in the sketch book or by looking back at pots I have previously made that I think worked well.  I also look at other potters works that I admire who are good at composition or at historical pots.  Drawing in my journal has been by far the thing that has helped me the most though.

Any more thoughts or comments? Let me know...it's fun for me to try and put this down in writing.

What Am I Thinking...

Michael and Carter both asked about my thoughts as I'm working on the current batch of pots.  Here's Part 1 of some answers to their questions.

I wish I could say that I was thinking about those birds migrating and how they moved across the pot (as Michael noticed)  and how I included a bit of landscape or imagery or whatever as I thought about their long flight.  Ha. Not the case at all.  At this point I'm thinking, "how can I not screw this up!"

I am bringing to the pot various little bits and pieces of imagery that I have collected over the past couple years.  The animals have been here since the beginning, we do live out in the county and are surrounded by birds, cows, the occasional stray goat etc.  I really wanted to put animals on pots because I love Ron Meyers' pots. He's one of the reasons I tried earthenware.  But as I drew the animals they became mine and I did start looking at the squirrels and crows and cows around me.

Same with the plant imagery.  We have a big oak on our fence line that I love to look at.  Sarah also has a weird house plant that I like.  But the first deco. with leaves and trees was inspired by Pennsylvania Dutch slipware.  And English slipware and Italian majolica.

So it seems that I look at pots first, see what others have done, and then sort of work backwards to what may have inspired them.  Then I go out and see what's around that is similar and I draw inspiration from that.  Does that make sense?  Ha. It's a funny way to go around one's elbow isn't it.  I'm also looking now at textiles and origami paper, and wood block prints for inspiration of imagery.

I do lots of drawing with a pen in my sketch book everyday.  Then I take all that stuff and try to combine it on the pots in a way that works.  I'll write more about that in Part 2 and try to answer how I respond to the drawings in the moment and what the pots and the tool I'm using play into the process.
The Tale of the Nail


The Tale of the Nail


Two decades ago a young man came to Penland School to take some classes.  He knew Penland would be a good place to learn more about painting and pottery.


After a few pottery classes he fell in love with clay and decided to learn the art of the potter.  He was particularly taken with Medieval English pottery.  He studied these pots in books and made many attempts at making the somewhat crude looking dishes and jugs.  He found that he could use a  nail to incise in the pots to get decoration similar to the centuries old pots.  He took a string and made a loop and tied his tool of choice to it.  He wore it around his neck and was never without the nail he used for making marks.

He went on to make thousands of pots and become a well known potter firing with wood making pots for everyday use.   I'm sure he still has the necklace with the nail hanging in his workshop somewhere.   Next time I visit I'm going to look for it.
(That is sort of my take on a story I was told about 10 years ago, probably not quite exactly as it was told to me, but close as I can remember.)

The image above shows a 16d nail next to my current tool of choice.  It's a steel rod sharped to a point.  It's sharpened on 4 sides just like a nail is and gives me several styles of line when I use it.  I've begun drawing on bone dry pots.  I need a strong tool like this to cut into the slip.  A needle too is too flexible and weak.  A tiny loop tool gives me too much of a consistent line.  The nail like rod is now the tool I prefer.

Yesterday as I was scratching away on the pots I thought of how this line is much like the line of the Medieval sgraffito and how a potter in that day and age would have used a similar tool.  This tool can be precise and also crude and rough.  I think the lines it makes suit my pots and my personality.

I've got to go now and find myself a piece of string.

Six Bowls


(click for larger images)


I've been crouched over drawing on these 6 bowls for quite a while.  Time to take a stretch break.  I've never put that much time into a cereal bowl.  If I'm going to work w this much detail then the costs are probably going to increase.  I do like these.


Happy Belated Birthday

Warren Mackenzie had a birthday on the 16th of this month.  I usually try to remember it and write a post about Warren.  Well, I forgot this year again.

The small grayish bowl in the center of the picture was made by Warren.  We have a couple of these and they are handy little prep. bowls, also good for condiments, or nuts.  I think they are funny pots. Just look at those handles stuck on there!! Ha. Great.


So I had to make a few to pay homage to my pottery hero.  Mine are a bit shallower but I stuck with the odd handles.

Happy late birthday Warren (not that you'd ever be found wasting time on the computer).  It's the thought that counts.

Knobandall Pt. 2

As promised here is the knob and all being finished.  It's best to cut these when they are leather hard.  The one in the video was still a bit  soft.  The lid will release from the body better if it's leatherhard.  Use a sharp fettling knife or Exacto knife to make the cut.

httpv://www.youtube.com/watch?v=fXP__mshJ1Y

The Knobandall

This video shows me making a knobandall.  That's knob and all, a small jar thrown in one piece.  Body, lid, and knob.  Part 2 will show how I cut the lid and finish it off.  Enjoy.

httpv://www.youtube.com/watch?v=zAZZr_DXzj8